

How To Stretch Pictures In Photoshop
At that place are a few methods you can use to stretch an image or layer in Photoshop. Stretching does, in issue, resize the image, only stretching is different than only scaling because you are altering the advent of the paradigm, not just the size.
Stretching an paradigm can produce interesting effects, but it is helpful to keep in mind that stretching may add together unnecessary pixelation. This is considering stretching an prototype beyond its original resolution results in a lack of pixels between the areas you've stretched, which so appear blurred equally the software fills in the space.
A stretched prototype may nevertheless expect fine, though, especially if it'southward a simple pattern, shape, or an image with a lot of blank space – it just may not exist every bit abrupt as it was before because of the loss of pixels. It is for this reason that you may non desire to stretch faces, animals, buildings, or landscapes with a lot of item, as stretching will noticeably alter both the advent and quality of these images.
With that said, small amounts of stretching won't be a trouble with these types of images. Throughout this mail service, yous'll not just learn a few easy ways to stretch layers in Photoshop but a helpful tip if you lot're wanting to extend an image to fit your canvas.
How To Stretch An Paradigm Or Layer In Photoshop
To stretch an image or layer in Photoshop, first, select the Move Tool by pressing Five and clicking your desired layer in the layers panel. Adjacent, click on any of the anchor points surrounding your layer while holding Shift. Now when you adjust its size, information technology volition be stretched in the management you drag.
This method with the Movement Tool and the shift key is 1 of the most basic methods of stretching layers in Photoshop. Nonetheless, it often causes bug, specially with your canvas size not matching your new image dimensions. Instead, the 3 other options below will be a more streamlined way to stretch your images.
Option 1: Increase The Width Or Summit Using Prototype Size
If you're looking to stretch an image, proceed in mind that if your sheet isn't big enough, your prototype volition be cropped if you stretch it beyond the boundaries of the canvas. You lot can easily fix this result by increasing the canvass size along with the image size, which happens automatically when you stretch using the Prototype Size tool.
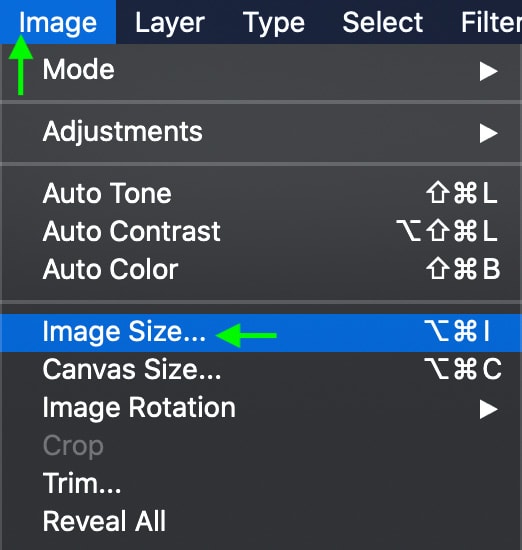
To practice this, open the file you want to stretch and go to Image > Paradigm Size.
In the window that comes up, commencement click the Link icon on the left to make sure information technology's not agile, as this will automatically alter the width to match the height value, and vice versa – thus resizing the paradigm instead of simply stretching it.
Then, select Percent from the driblet-downwardly carte du jour next to Width and Top. Type the value in the box that you'd like the width or tiptop to increase by – for example, 150 percent. That means the top of my canvas will be 50% larger than the width once this stretch is applied.
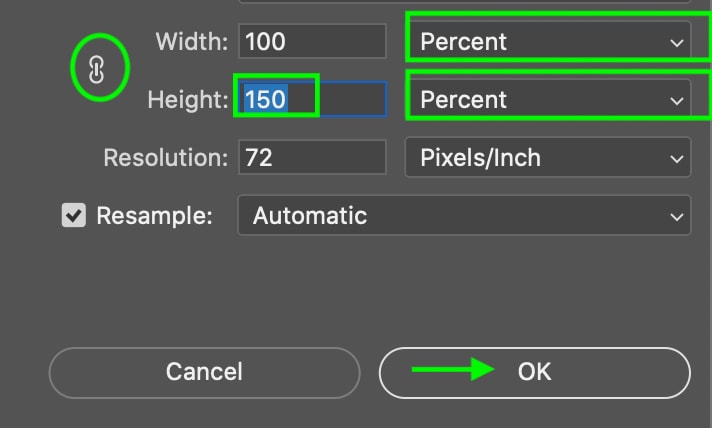
Keep in mind that you must utilize a value over 100 pct in lodge to add to the epitome; using a value below 100 volition warp the image in.
At present click OK and you'll see the image stretched according to the percentage you set.
For my example, hither is the original image:
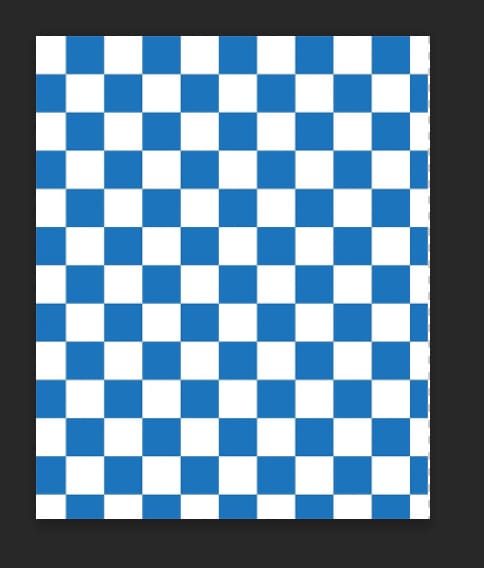
And this is how the image looks later on stretching the summit 150%:

The image is noticeably stretched, and because the Prototype Size dialogue box changes the canvass size to see the image, nosotros don't have any cropping. To undo your work and attempt a new percentage, become to Edit > Undo and repeat the process until you lot're happy with the stretched effect.
Option 2: Use The Transform Tool With The Distort Setting
The transform tool has tons of different uses, from scaling your epitome to rotating it, to distorting it in dissimilar means. Using the Transform tool with the Distort setting will permit yous to stretch your epitome in whatsoever direction you'd like, warping its appearance.
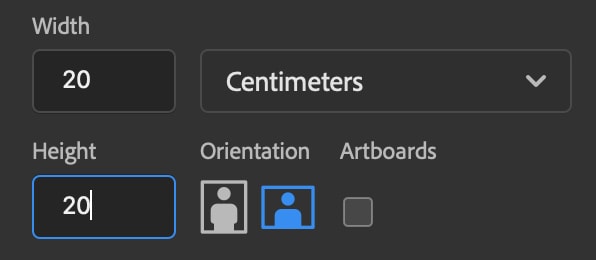
To practise this, beginning, open up a new certificate. In the New Document window, make sure you lot set the canvass size much larger than your intended image; otherwise, the paradigm volition exist cropped if you stretch it across the canvas. I'chiliad setting mine to xx×20 centimeters, but feel free to play around with whatever size works best for your paradigm.
At present, add your photo to the canvass past dragging and dropping the epitome from your computer. This volition add the prototype as a new layer, as opposed to the groundwork layer. It is important for your image to exist as a separate layer from the background, equally you cannot use the Transform tool on a background layer; since it is locked. Although you can unlock the background layer, information technology's easier just to add your epitome to an existing projection by dragging and dropping.
With your prototype imported, brand certain information technology's selected in the layers panel.

And so select the Motility Tool (V).

Now, head to Edit > Transform > Misconstrue.
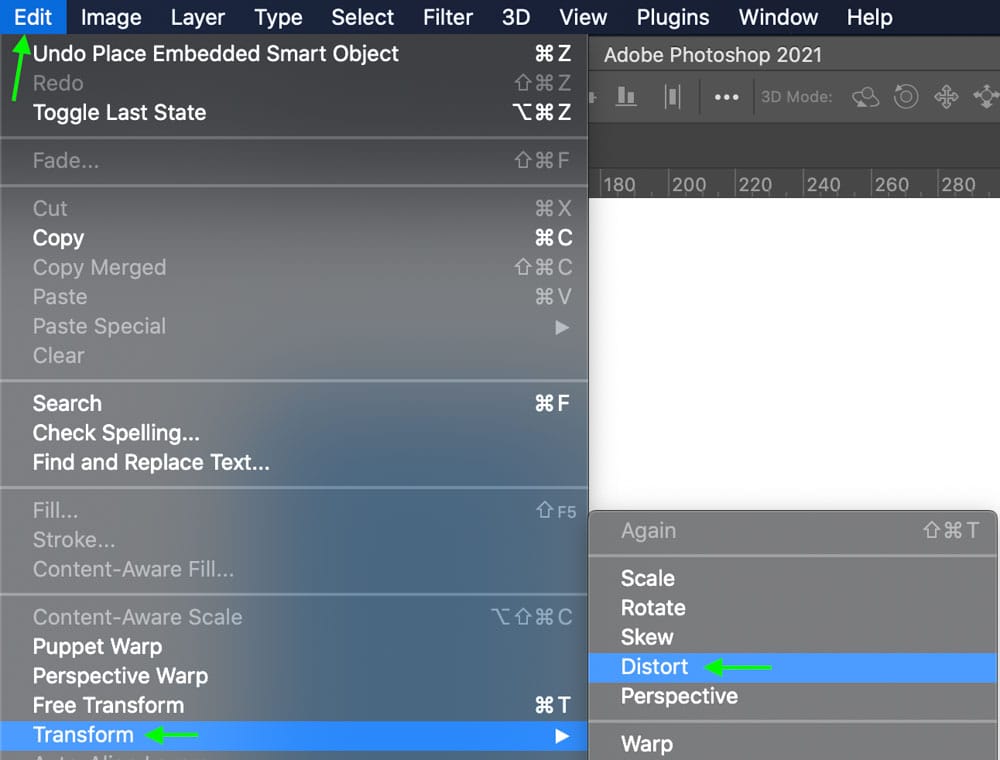
So click and drag any of the anchor points on the transform box to stretch that part of your image. The Distort settings will allow you free reign to stretch your image vertically, horizontally, or diagonally.

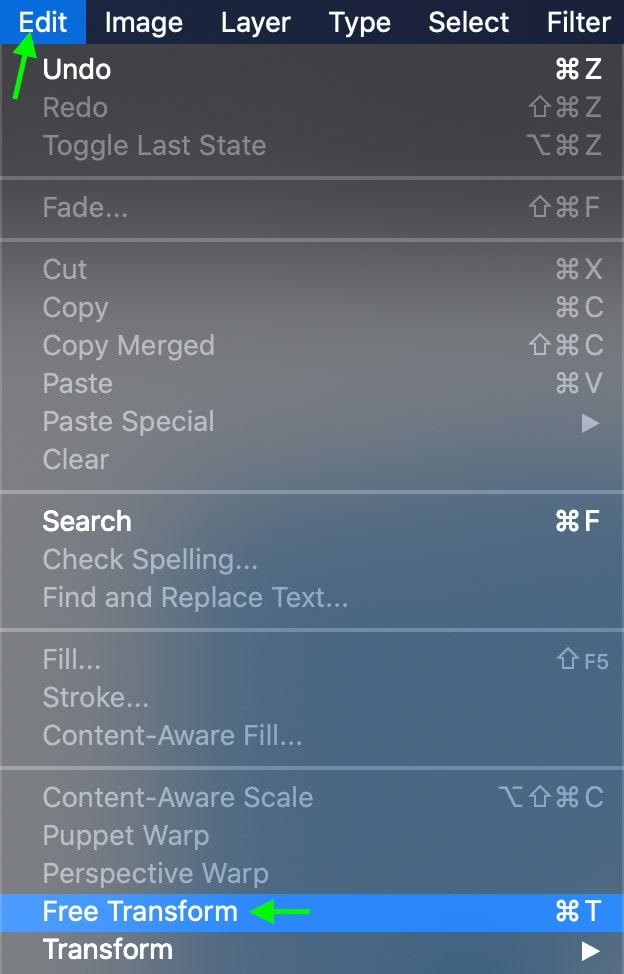
Another quick way to stretch your image using this same tool is to caput to Edit > Gratis Transform or using the Command + T (PC) or Command + T (Mac) shortcuts. Once the transform tool is agile, you lot tin right-click on the layer and cull Distort from the menu that appears instead.
Costless Transform only really differs from Misconstrue when moving the corner ballast point. Free Transform moves the sides and corners of your paradigm forth with the one you're clicking and dragging. Meanwhile, the Misconstrue setting keeps all sides locked in place and only stretches the epitome based on the ane corner you're stretching.
However, by property Alt (PC) or Choice (Mac) and dragging one of the anchor points, the paradigm will distort the opposite side equally.
Just retrieve the transform tool only works when the Move tool is active. And then make certain you've selected the Motility Tool (V)!
Pick three: Stretch An Paradigm With The Content-Aware Scale
Using Content-Aware Scale stretches an image to fit an aspect ratio that you've specified, but tin can protect certain areas of the image from existence distorted past the stretching process.
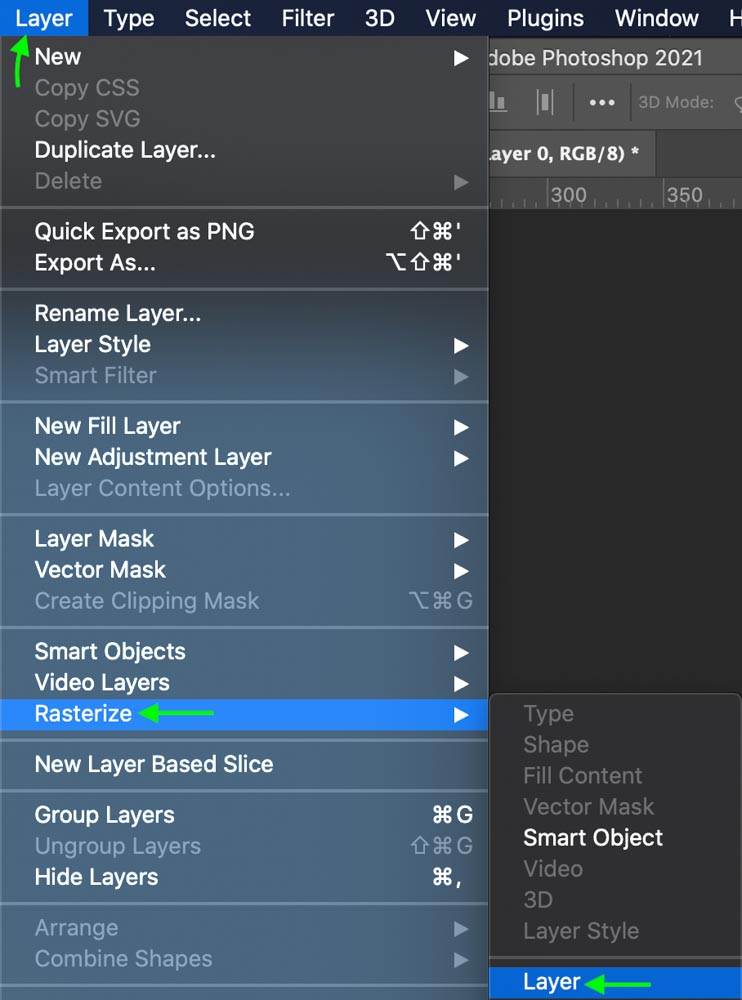
Before y'all start, your layer cannot be a smart object. If it is, y'all won't be able to use the Content-Enlightened Scale since information technology'll be greyed out. Luckily y'all can ready this by right-clicking on the smart object and selecting Rasterize Layer.
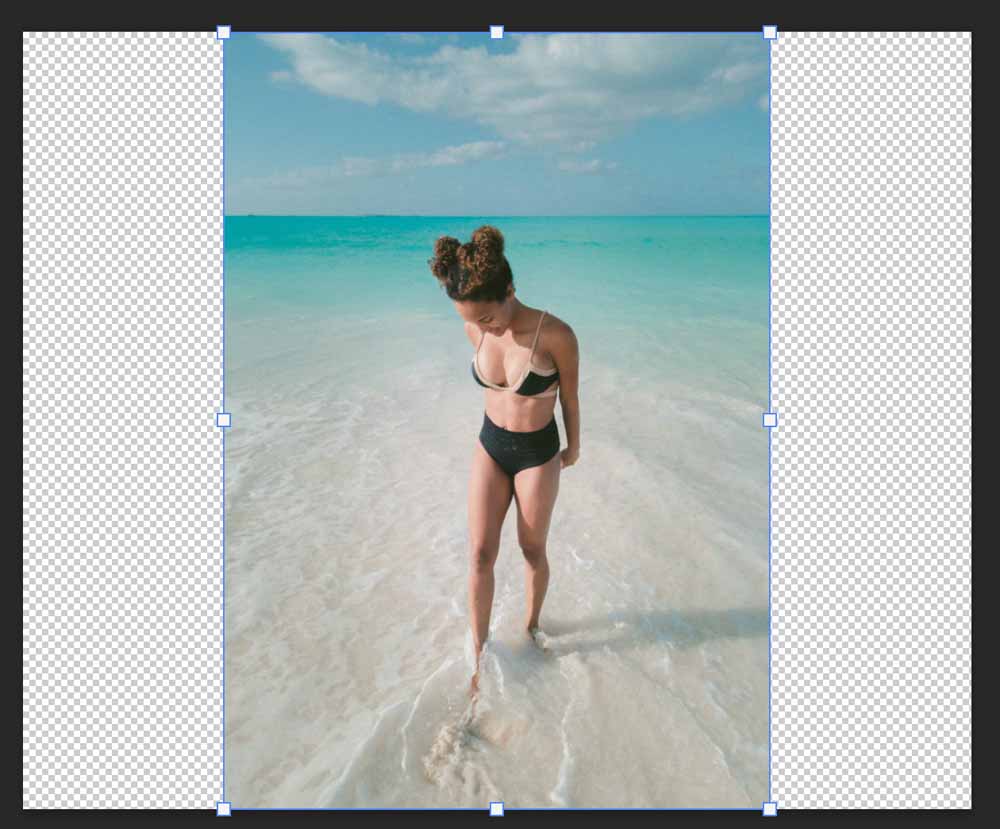
Once rasterized, use the Crop tool (C) to extend the canvas to the amount that you'd similar the image stretched. You lot tin extend one side at a time, or hold the Alt/Option key to extend both sides of the canvas simultaneously. Since I want to make this portrait photo horizontal, I have extended the sheet outwards in that direction.
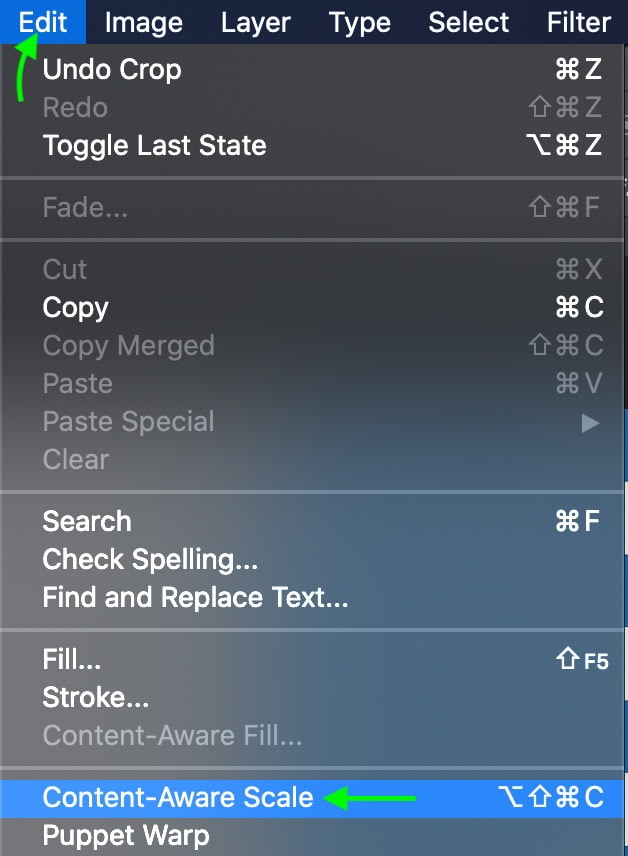
Now it's fourth dimension to use the Content-Aware Scale which means you must offset, select the Move tool.
Then head to Edit > Content-Enlightened Scale.
In the upper setting bar, y'all tin type in the new width and tiptop of the epitome, or you can simply use the anchor to stretch your paradigm to fill the transparent areas of the sheet.
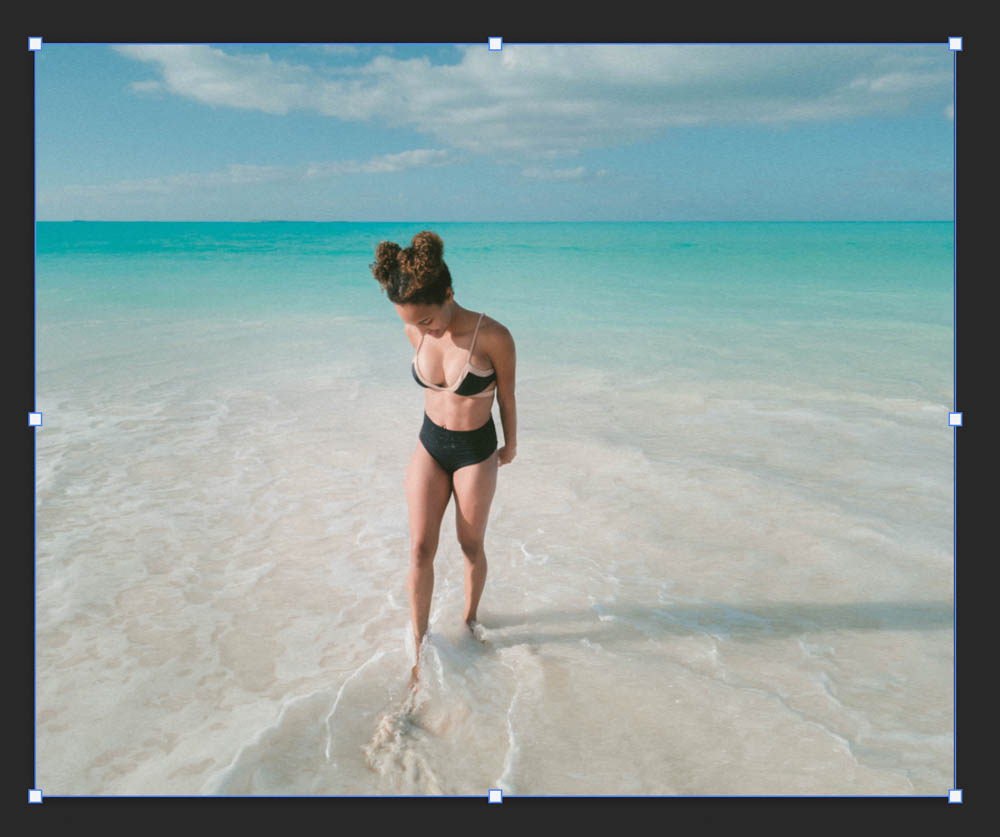
Find that, even though we've stretched the groundwork, the person in the middle doesn't appear stretched. This makes the Content-Enlightened Calibration a great option for stretching images but retaining some of the data. Content-Aware Scale has a lot of advantages for stretching images without distorting your discipline. I explain more than well-nigh this technique and the downsides to it in this tutorial on extended backgrounds in Photoshop.
Stretching an image doesn't have to be difficult, nor does it have to warp the entire epitome and result in depression quality. These methods will allow you to stretch objects in Photoshop while retaining much of the quality and still getting the desired effect.
Happy Editing!
Source: https://www.bwillcreative.com/how-to-stretch-an-image-or-layer-in-photoshop/
Posted by: donnersily1998.blogspot.com
0 Response to "How To Stretch Pictures In Photoshop"
Post a Comment