

How To Create Watermark Action In Photoshop
And so on twitter yesterday we were talking about watermarks and I mentioned I created an action in photoshop for how I do my watermark so I tin speedily add my water marker to a batch of images. In fact I LOVE creating actions, I have actions for everything so I can easily edit batches of pictures. I take 2 for watermarks, one for an embossed watermark and a plain white one. I still oasis't decided which 1 I like meliorate! I too have deportment for resizing (to the width I like to us in my blog, also saving the pictures in spider web quality in a separate folder (and then that they load easier). And another vi actions for diverse things I do often with lots of pictures! Actually I've been known to throw together an action when I'm doing the same thing to just a handful of images as a 1 time batch and then deleting it! I don't use information technology for any image editing, like color correction, brightening or cropping, that I exercise individually.
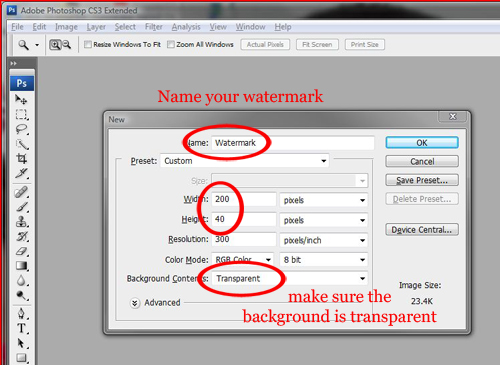
ane. I start with creating an image I'thousand going to employ for my watermark. y'all tin can employ anything, only for this tutorial I'1000 just going to use the word watermark. You need to open up a new image. The first big question is what SIZE do you want your watermark, some people like it large and some like it small information technology'due south up to y'all. I volition be working with an image that'south 400 pixels wide and want you to see the watermark hands so I'k using 200 pixels broad. Proper name your image and make sure the background is transparent! Click okay!
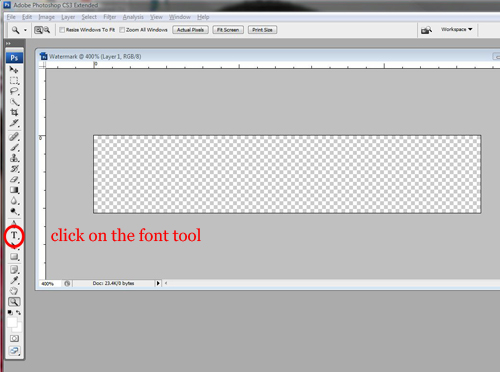
ii. Here is my new image! Next create your watermark. Again, I'm using a word today, and then I outset with the font tool.
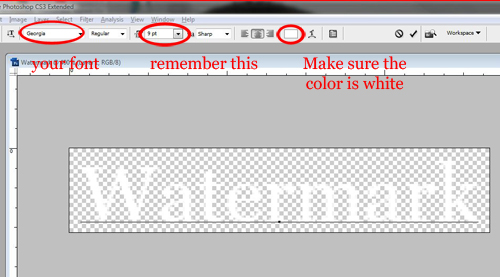
3. I went with an like shooting fish in a barrel to read one for today, simply you tin can use any font you lot want. Besides make sure the color is white if your considering embossing. If not you can go with whatsoever colour you want, simply I'd still suggest white, it shows upwardly on picture better and will match any image. The font size is totally up to you, but you'll want to call up it subsequently if y'all want to create an embossed watermark.
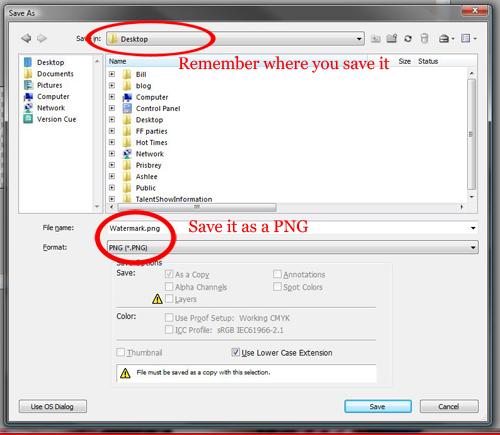
4. At present relieve it! Make certain yous save it as a PNG, if you lot accidentally save it as a JPEG you'll take a white background. A PNG keeps the background transparent. The other important thing is to remember to salve information technology someplace permanent. The activeness won't work if you motility your image to another binder later. And Close.
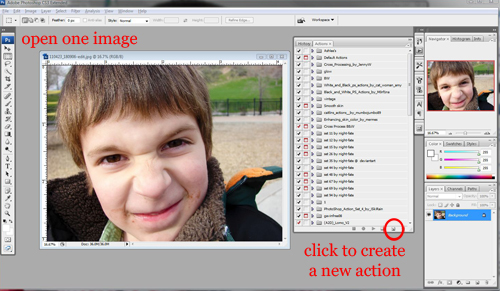
5. Now while the goal is to be able to easily play our action for one or MULTIPLE images we only want 1 flick pulled up while we create this action. Too many other open picture tin can create problems. Then open I. I chose this one from the park last week of my expressive piddling male child! LOVE his sweet confront!
Make sure it's the width y'all regularly apply for your blog (again when I'one thousand working with pictures for my weblog I e'er employ my resizing action start, if y'all practise it Afterwards adding your watermark information technology volition also resize the watermark!). Now is when we start our action! Click on the activity tab, so on the bottom click on "create a new action"!
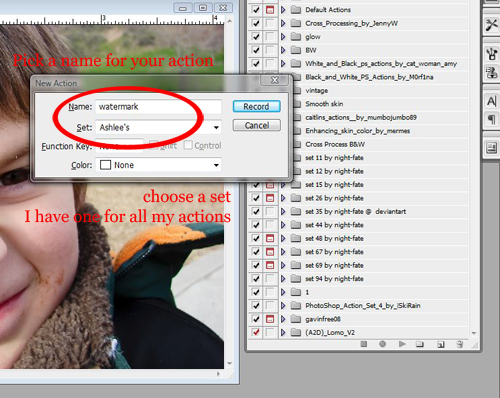
vi. Name your activity and place it in a set. If you don't have a personal set for your own deportment then create a new set offset, THEN add together a new activity! Press Record.
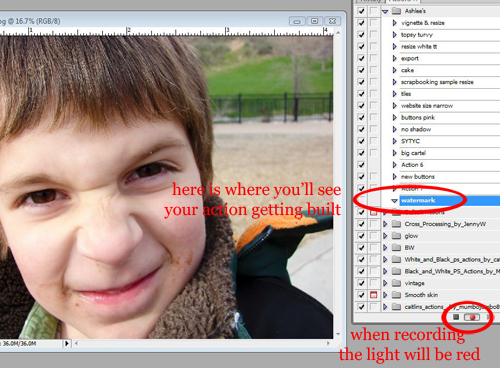
seven. The dot will turn crimson letting y'all know it'south recording (if you ever need to cease but click the square on the left side, you can restart recording anytime). Y'all'll be able to encounter your action build every bit you start working on your epitome. What you lot'll practice to this image is creating your watermark while recording so you lot'll exist able to PLAY this activeness and photoshop will follow exactly what you recorded for all future images! It saves And then much time.
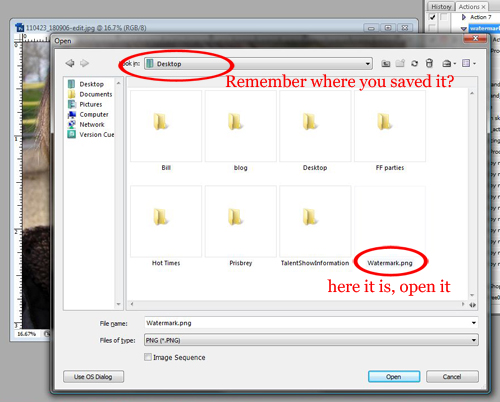
eight. Now nosotros want to open our watermark PNG. And so open up the binder where y'all saved information technology, click the PNG (you might accept also saved a PSD so brand sure) and open it.
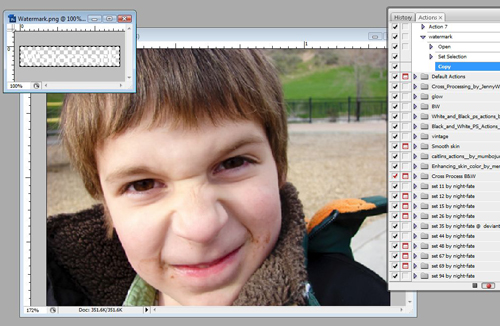
ix. This is important: do Not click back and forth from your watermark image and the picture, EVERYTHING you do is recorded so y'all don't want to constantly exist "alter to previous image" it will seriously mess up playing the activity after!. Then working ONLY with the paradigm you lot but opened "select all" (Ctrl-A) then "copy" (Ctrl-C) and Shut the watermark PNG. Once more, very important, this volition automatically have you back to the moving picture and won't create any of those messy "change to previous epitome" lines in our action.
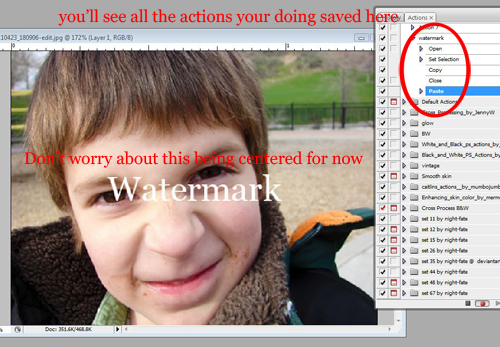
10. Now "paste" (Ctrl-Five). Your watermark image SHOULD testify upwardly correct in the eye of your pic. Don't worry most that correct now, moving your water mark is an action that doesn't piece of work (I've been trying to figure out a style to go far always in the bottom corner, only haven't been able to get it to piece of work, maybe in a newer version of photoshop), then we'll worry about moving it later. Correct now we just want to work with things that CAN be done to multiple pictures hands. And y'all'll be able to run across the "open image", "prepare selection", "re-create", "close" and "paste" growing on the activeness tab! Yeah it's working!
Now if all yous want is a white y'all can click "stop" (the foursquare left of our red circumvolve) and skip down to where I talk about using the activeness every bit a batch. Gyre downward to number 16… If you lot want to learn to emboss your watermark keep going!
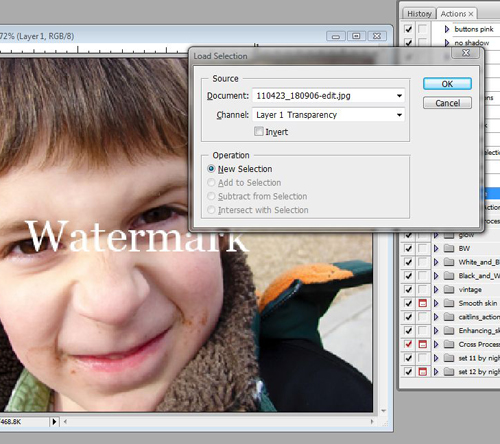
xi. Now this is just how I learned to exercise it, if you take another way you like amend that'south Merely fine, there are tons of ways to become this event, and then do what you're comfortable with! Get-go we want to select JUST the letters (as the exact messages, NOT the rectangle around the watermark or the full image… go up to "select" then "load selection" and press "OK"! Now you should have a dotted lines around the letters!
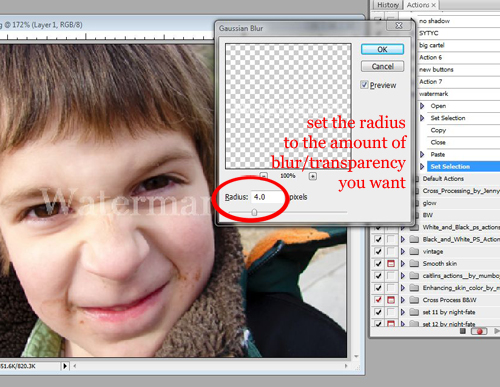
12. Next up fading the messages using a blur. Go to "filter" then "blur" then "Gaussian blur". This is where the size of your font (watermark) comes in handy. The radius you choose could be totally different from mine. My font was 9 and my radius is 4.0. The larger the letters the larger the radius volition need to exist. If you take "preview" checked yous'll be able to see the watermark changing on the prototype itself. See how faded the word "watermark" is on my movie? This is totally about your preference, and at present much you want your embossed paradigm to show up. When your happy click "OK"
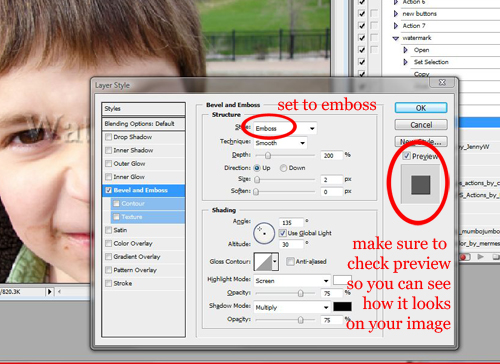
thirteen. Now we're going to emboss the prototype. Click "Layer" and so "layer style" then "bevel and emboss". It will bring up this screen. Again y'all want the preview box checked and then you tin can run into how information technology'southward effecting the watermark and how it looks on your moving picture. Under the "mode" drib down bill of fare choose "emboss". The remainder, the depth, size and shading bending is all upwardly to you! play with information technology a bit checking the preview and when your happy with it click "OK"
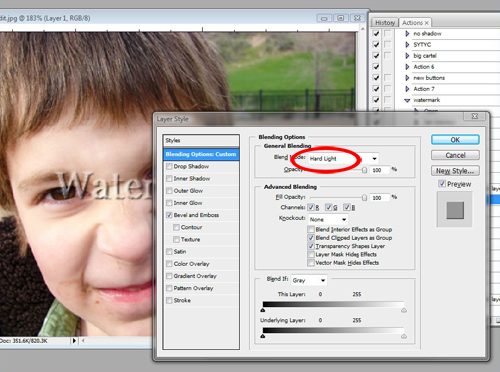
xiv. And finally blending options. Honestly afterward going over this again I'1000 non sure what the signal of this 1 is, like I said before it's just how I learned to do it. So if you similar the alter it makes go for it. "Layer" then "layer way" then "blending options". When you lot take this menu change the "blend mode" drop downwards menu to "difficult light"
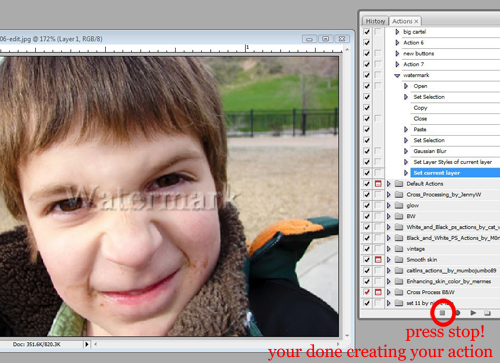
15. And now we're washed with our activeness and so click "terminate recording"!!! Now on to test our action!
16. I airtight the motion picture I created the activeness on and opened a group of images (using the same 1 you guys have already seen to attempt to stay consistent?) Anyhow if y'all just want to apply an activity on one flick just click on the "action" tab, then highlight your new action and press "play" (the triangle on the Right side of our recording dot).
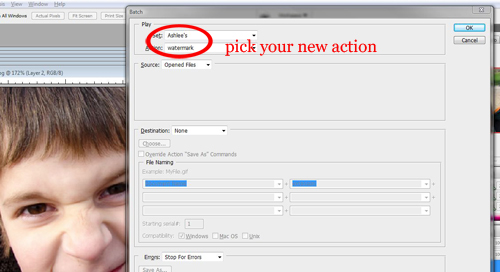
But if you desire to employ your action on a group it's super easy. Click on "file" then "automate" then "batch". You'll get this screen, pick your set, then your title and press okay!
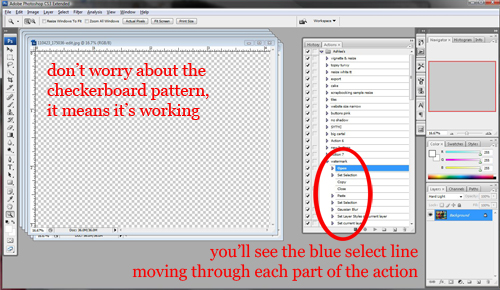
17. Depending on how many images you have open up this could go really quick or really slow (I've done upwardly to 250 at one time, it took near 20 mins). Anyway while it'due south working it'southward way through your pictures you'll come across a checkerboard pattern instead of the images, that's okay, it means it'south working. y'all'll also see in the action tab the highlighted area going down as it works on your action.
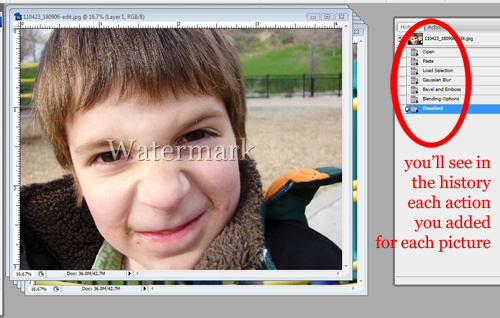
eighteen. If it's all been done correct each picture should have your watermark correct in the centre of them, AND if you look at their history tab'due south they should all have the exact deportment y'all created listed!
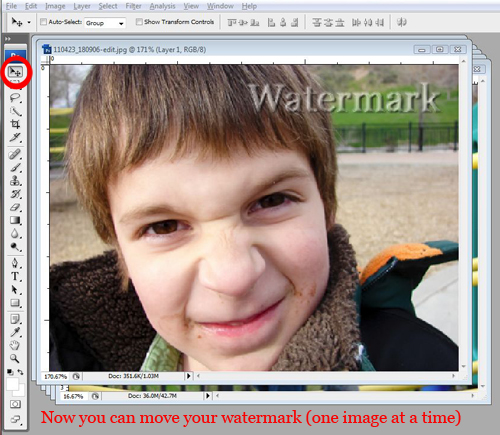
19. Finally now is when I go through and move the watermarks around. I practise this one flick at a time to make sure the image isn't roofing annihilation Besides important! Click on the "move tool" (Shift-V) and motility information technology effectually (oh, brand certain the right LAYER is highlighted, sad, I totally cropped that off!). After I'm done with 1 image I minimize information technology and piece of work my way through the rest. And so I use yet some other action to save them all into a binder on my desktop every bit a web image (so they load easier and faster). I accept a folder Merely for images for my blog and so they don't go mixed in with my original images. Kind of an organizing freak when it comes to my pictures on my estimator! I also rename the images in the folder before I upload. I similar to continue all original images named by date and time and so they always stay in the right order- like I said, kind of a freak about it!
AND nosotros're done! You can use the same idea to create actions for just about anything! Including absurd furnishings for your pictures. One time you effigy out how it'south easy equally pie! I'm an activity nut and I promise this was clear enough that information technology helps someone out!
- Writer
- Recent Posts

With the right tips and tricks, I believe YOU can brand, bake, or create anything. This is what I dear to practice - make some awesome, teach you how, and requite you that boost of culinary confidence you need to rock your own kitchen!
You take Successfully Subscribed!
Source: https://ashleemarie.com/how-to-create-a-watermark-action-in-photoshop/
Posted by: donnersily1998.blogspot.com
0 Response to "How To Create Watermark Action In Photoshop"
Post a Comment